Getting Started
The Web Perception Toolkit is an open-source library that provides the tools for you to add visual search to your website. The toolkit works by taking a stream from the device camera, and passing it through a set of detectors. Any markers or targets that are identified by the detectors are mapped to structured data on your site, and the user is provided with customizable UI that offers them extended information.
Install and embed the Toolkit
To begin with you will want to install and embed the Perception Toolkit JavaScript.
# Install and save the toolkit to your package.json file.
npm install -S perception-toolkit<script src="//path/to/perception-toolkit/lib/bundled/bootstrap.js"></script>Configure Your Experience
With the library embedded you can now configure the Perception Toolkit. This is done by putting a PerceptionToolkit object on window which contains your custom configuration.
To begin with you should add both the path to where the toolkit is installed, as well as a reference to the button used to launch your experience.
<script>
  // Config - place above the previous script element.
  window.PerceptionToolkit = window.PerceptionToolkit || {};
  window.PerceptionToolkit.config = {
    // The location of the installed toolkit.
    root: 'node_modules/perception-toolkit',

    // The element used to launch the experience.
    button: document.getElementById('get-started')
  }
</script>
To ensure that the button is only shown when a user’s device is capable of running the toolkit, the button should be hidden, and the toolkit will toggle a visible class once loaded and device support is confirmed.
#get-started {
  display: none;
}

#get-started.visible {
  display: block;
}
Apply styles and markup
The Perception Toolkit uses Web Components for its various elements. The toolkit itself includes some basic styling that you can embed to ensure that elements such as the video stream take up the whole viewport.
<link rel="stylesheet" href="//path/to/toolkit/styles/perception-toolkit.css">Please note: Web Components are fully supported on the latest versions of most major browsers. If you require polyfills please refer to the Web Components JS repo.
As Web Components, the toolkit’s elements can be restyled with CSS as needed. The elements themselves are also configurable. For a list of element properties that can be changed please refer to the Perception Toolkit API documentation.
Embed structured data in your pages
There are several ways you can provide structured data to the toolkit for it use during target lookup. To begin with we will embed the data in the same document as the toolkit itself.
<script type="application/ld+json">
{
"@context": "https://schema.googleapis.com/",
"@type": "ARArtifact",
"arTarget": {
"@type": "Barcode",
"text": "Inline Barcode"
},
"arContent": {
"@type": "WebPage",
"url": "http://example.com/item.html",
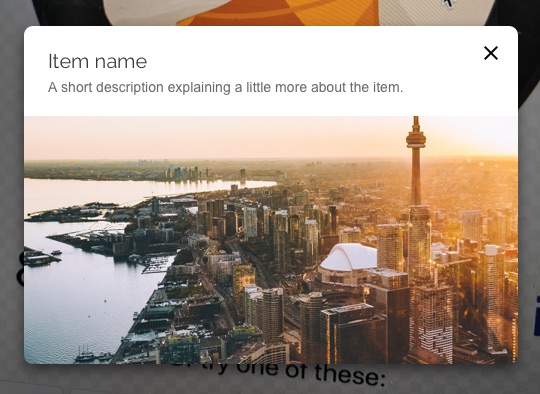
"name": "Item name",
"description": "A short description explaining a little more about the item.",
"image": "http://example.com/images/item-image.jpg"
}
}
</script>There are some things to notice about the tag and contents above. First, the script’s type should be set to "application/ld+json". This will prevent the browser attempting to parse the contents as JavaScript. Second, the three properties "@context", "@type", "arTarget", and "arContent" must all be set, where "@context", and "@type" should be exactly as shown above.
Within the "arTarget" property you will see two further properties: "@type" and "text". The type represents the target’s type, and should be set to "Barcode" for barcodes and QR codes. The "text" property contains the decoded value you anticipate to read from the code, which can be any value embeddable in barcode and QR code symbologies.
The "arContent" property points to an object with extended information about the item, such as its type, url, name, description, and any image associated with it. The toolkit will, by default, render a card UI with the information from this object.
Using a structured data artifact map
If you wish to provide the toolkit with a set of targets, the most convenient way to do this is with an artifact map file. This is a file containing an array of valid AR Target objects similar to the one outlined above. To make this available to the toolkit you should use a script tag with a type of "application/ld+json" and a src attribute that points to the location of your sitemap file.
<script type="application/ld+json" src="//path/to/your/sitemap.jsonld">On initialization the toolkit will parse the hosting document to locate any links to sitemaps and will load them automatically.
Alternatively, you can pass the sitemapUrl config property, which is a string containing the path to the sitemap.
Guide the user experience
The toolkit makes use of custom events during its lifecycle. Making use of the preventDefault() function on the dispatched events allows you to take control of various aspects of the lifecycle, such as card rendering.
When camera access is denied
If access to the camera is denied by the user the toolkit will dispatch an event, which can be handled directly in your code. The toolkit’s Card UI element is exposed on the PerceptionToolkit.Elements object, and can be instantiated in your code.
function onCameraAccessDenied(evt) {
  // Stop the toolkit from rendering its own card.
  evt.preventDefault();

  const { Card } = PerceptionToolkit.Elements;
  const card = new Card();
  card.src = 'Camera unavailable or access denied';
  this.container.appendChild(card);
}

window.addEventListener(
  PerceptionToolkit.Events.CameraAccessDenied,
  onCameraAccessDenied);
When a result is found
The toolkit will dispatch a "pt.perceptionresults" event which contains arrays describing the results that have been identified and which appear to have left the camera’s view.
const container = document.querySelector('.container');

async function onPerceptionResults(evt) {
  // Take control of the UI rendering.
  evt.preventDefault();

  // Prevent multiple cards from showing.
  if (container.childNodes.length > 0) {
    return;
  }

  // The event detail contains an array of found and lost results.
  // Each object contains a 'content' property, which is from the
  // structured data.
  const { found, lost } = evt.detail;
  const { Card } = PerceptionToolkit.Elements;

  // Getting an event with zero diff implies an unknown item.
  if (found.length === 0 && lost.length === 0) {
    const card = new Card();
    card.src = 'Sorry, that marker was not recognized.';
    container.appendChild(card);
  } else if (found.length > 0) {
    // Grab the zeroth found entry.
    const card = new Card();
    card.src = found[0].content;
    container.appendChild(card);
  } else {
    // Handle any ‘lost’ items.
  }
}

window.addEventListener(
    PerceptionToolkit.Events.PerceptionResults,
    onPerceptionResults);
Advanced Patterns
Detecting device support
This will, by default, run tests on the device to detect support for the APIs that the Perception Toolkit requires. If the device does not support – say – camera access or wasm, a "pt.devicenotsupported" event is fired on window.
// Fires if the device does not have the required APIs.
window.addEventListener(PerceptionToolkit.Events.DeviceNotSupported, () => {
  // Handle unsupported devices.
});
The Perception Toolkit will enable visibility of your experience’s launch button, which it will only do should the device support tests pass. As such it is typically only necessary to listen to the "pt.devicenotsupported" event for analytics purposes.
Customizing the Toolkit
There are many options available for configuring the Toolkit. For a full list, see the Perception Toolkit API documentation.
Listening for the end of capture
When capture has stopped the toolkit fires an event, which can be used for customized behavior or analytics.
function onCaptureClose() {
  // Do custom work here.
}

window.removeEventListener(
    PerceptionToolkit.Events.CaptureClosed,
    onCaptureClose);